toasters : the dangers of breadcrumb accumulation and the correct way to clean it

Quick answer: why is my toaster smoking?
A toaster may smoke because crumbs, stuck bread, frozen-food residue, or a very high shade setting are heating inside the slots. Unplug it, let it cool, clean the crumb tray, and stop using it if smoke continues after cleaning.
| What to check | Why it matters |
|---|---|
| Start with the simple causes | Crumbs, bread fit, placement, and settings often explain everyday toaster problems. |
| Watch for warning signs | Repeated smoke, sparks, damaged cords, or breaker trips are reasons to stop using the toaster. |
| Compare the broader guide | Use the how to clean a toaster when the issue connects to choosing, cleaning, or replacing a toaster. |
- Empty the crumb tray.
- Check for stuck bread after unplugging and cooling.
- Lower the shade setting for thin or dry bread.
- Stop using the toaster if smoke continues without food inside.
FAQ
Is toaster smoke always dangerous?
Not always, but it should be checked. Crumbs are common, while repeated smoke after cleaning needs more caution.
Can frozen waffles make a toaster smoke?
They can leave crumbs or residue, especially if the slot fit is tight.
When should I replace a smoking toaster?
Consider replacement if smoke continues after cleaning or if there are electrical warning signs.
In many households, the toaster is a near-daily fixture. It delivers a golden, crispy slice of toast in the morning and adds a sense of ritual to busy lives. However, most people simply tap or dump the toaster out after use, overlooking a hidden danger: the crumbs that accumulate inside the toaster . These seemingly harmless crumbs could actually be slowly impacting the machine’s performance and the safety of the family.
1. The hidden dangers of breadcrumb accumulation
1. Increased fire risk. The interior of
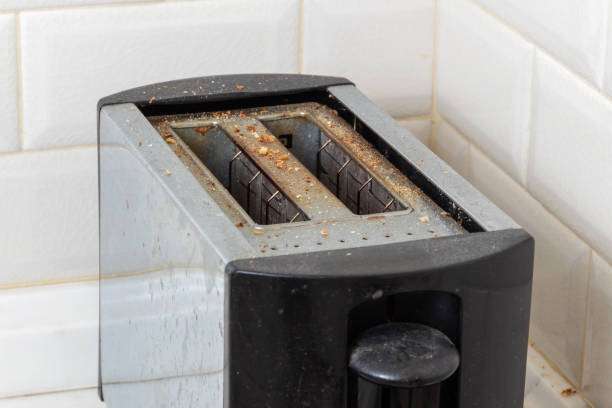
a toaster is a high-temperature environment. When crumbs accumulate on the heating wire or the metal tray at the bottom, they can easily become charred during repeated heating. Once these crumbs encounter high temperatures or grease drips, they can ignite a flame. Especially in a small kitchen or when multiple people are working simultaneously, these small flames can easily go unnoticed and become a potential fire hazard.
2. Impacting heating efficiency and taste.
When crumbs coat the heating element or get stuck in the gaps between the trays, heat energy is partially absorbed or reflected, resulting in uneven heating. You may find your toast burnt on one side and soft on the other. This isn’t due to the machine’s aging, but rather to poor heat circulation caused by the crumbs. Over time, this can lead to an invisible increase in your toaster ‘s energy consumption.
3. Bacteria and Odors:
Crumbs are food residue that absorb moisture and mold when exposed to kitchen humidity, creating a breeding ground for bacteria and mites. Adding a burnt smell from high temperatures to the mix not only affects the aroma of toast but can also add a slightly unpleasant odor to breakfast. For sensitive individuals or children, these hidden contaminants can even cause respiratory discomfort.
2. The importance of regular cleaning
Cleaning your toaster isn’t just for aesthetics or hygiene; it’s also crucial for extending its lifespan and ensuring safety. Most brands’ instructions recommend a simple cleaning every week or every few uses, with a thorough internal cleaning every month.
A clean toaster distributes heat more consistently, ensuring even color and a crispy texture for your toast. It also helps keep the air in your kitchen fresh, preventing burnt odors from spoiling the kitchen.
3. Safe and efficient cleaning methods
1. Power off and allow
the machine to cool down completely. Before cleaning, be sure to unplug the machine and wait for it to cool down completely. Never operate the machine while it is still hot to avoid burns or short circuits.
2. Make good use of the crumb tray and soft-bristled brush.
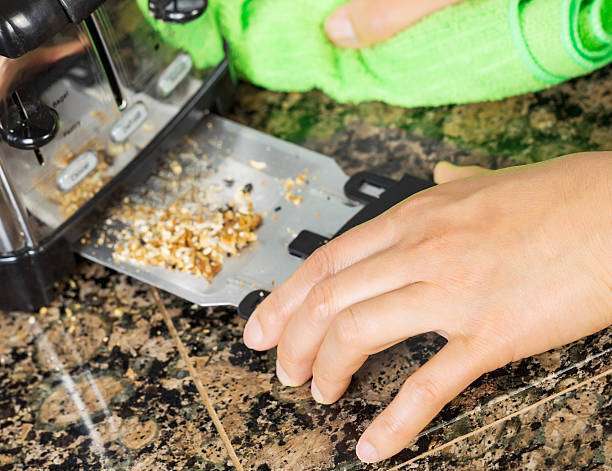
Most toasters have a pull-out crumb tray on the bottom, which is the first step in cleaning. Gently remove the tray and wipe it clean with a soft, dry cloth or paper towel. Use a small brush to clean any remaining crumbs. If you don’t have a crumb tray, gently turn the machine upside down and tap the back to let the crumbs fall out.
3. Avoid using water or detergents . The heating elements and circuitry inside
the toaster are extremely susceptible to moisture. Avoid directly rinsing with water or spraying with detergent. Instead, wipe the exterior with a lightly dampened cloth. For stubborn stains, gently wipe with a cotton swab lightly dipped in baking soda and water, then wipe dry.
4. Check details to prevent
problems before they occur. After cleaning, be sure to check the power cord for signs of aging and loose sockets. If you notice persistent odors or uneven heating, it could be due to excessive carbon buildup or damaged heating elements. Send the unit for repair or replacement immediately.
4. Develop good usage habits
Besides cleaning, daily habits can also help reduce crumb accumulation. Gently shake off any crumbs before adding the toast to the machine, or choose a model with a crumb screen. Gently patting the machine a few times after each use to cool it down is the easiest way to prevent accumulation.
Also, avoid putting bread with syrup or butter directly into the machine, as these ingredients will melt and drip, accelerating sticking and burning.
V. Conclusion
Many people enjoy the aroma of a toaster , but overlook the “little world of dust” behind it. Crumbs may seem insignificant, but they can silently shorten the lifespan of the machine and even pose a safety hazard.
Regular cleaning not only keeps your toast purer, but also keeps your kitchen safer. After all, a clean toaster isn’t just the starting point of your breakfast; it’s a reflection of your quality of life.